One Pan Creamy Chicken Burritos
Let's get started. What is in this huge pan of goodness?
(Ps. pans are Ecolution, http://www.amazon.com/gp/aw/d/B005M8XWZK)
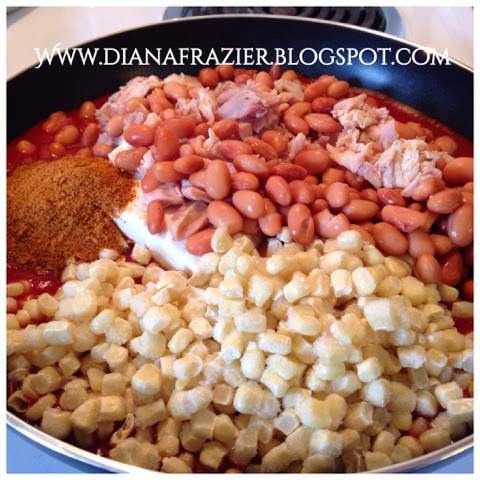
1 15oz can tomato sauce
1 8oz package cream cheese
1 can pinto beans, drained and rinsed
1 1/2 cups frozen corn
3 Tbs bulk taco seasoning
Chopped rotisserie chicken, as much or little as you want. This is about 2 Cups worth.
And....that's it!
Please feel free to add:
Black beans, drained and rinsed
Olives, drained
Chopped onion
Chopped bell pepper
Leftover rice or quinoa
Etc. add what your family loves!

Add all to a large skillet or saute pan and cook over medium heat until cream cheese is melted and corn is heated through (remember, chicken is already cooked). Get a clean spoon and taste the filling. The best chefs taste their food! You can adjust seasoning here. If it's too salty, add some more beans or cream cheese. Not enough seasoning? Add more taco sauce. When you think it tastes yummy, turn off the burner, you are ready to fill your tortillas.
Ok. Time to prep your burrito area. As you can see, I am doing all of this just on the stove area. Of course you need to make sure all burners are off. Even in a small kitchen you can make kickbutt burritos!

I use large flour tortillas, the huge pack from Costco, a baking sheet, and mozzarella. Use whatever cheese you want, truly. You can even smother them with Velveeta and I won't judge! I buy a mega bag of mozzarella at Costco and freeze it. Grated cheese generally freezes really well. No need to thaw before using.
To soften your tortillas and make them easier to roll with, microwave a few at a time for about 20 seconds. I store my extra tortillas in the freezer. They freeze beautifully!

I use the same wooden spoon I cooked with and place a good scoop of the mixture in the middle of the tortilla. I fold once the long way (yes, that is the uber technical culinary term ;)), fold one end, fold again the long way and then the final end.


I know they look sort of wonky and there are probably a million better ways to do it, but I sort of like them wonky. While baking, they get a bit crispy on the outside pieces while still staying ooey gooey on the inside. The top two on the pan are the large flour tortillas, the middle two are little 6" flour tortillas. I decided I'd make several little ones for my 5 and 3 year old. And hot dang the mini burritos are cute!

There they are, my pretties! There were two more large burritos but I put them in the *freezer for a different day. I sprinked cheese on top and placed the pan in the fridge. They are ready to bake for dinner! Whenever it's time to eat, simply bake at 350 for about 15-20 min; until cheese is melted and burritos are desired crispyness. Yum!
They are delicioso topped with Mexican sour cream (warning: it's freaking good!), avocado, salsa, and a big ol' side of Juanita's chips.
*To freeze and serve later:
Place burritos on a cooking sheet and freeze them for about an hour. Remove from the freezer and baking sheet and individually wrap in Saran Wrap. Place all burritos together into a Ziploc Freezer Bag. To cook, remove a burrito from the freezer bag and remove the plastic wrap. Wrap in a paper towel and microwave 2-3min (depending on microwave). Bam- homemade frozen burritos. You're welcome!
Thank you for visiting Sparkly Granola, I hope you love the burritos as much as we do!
Comments
Post a Comment